During the summer months when it seems like there are extra hours in the day, I like to augment my practice by spending a lot more time with some intensive technique exploration and then learning new repertoire where I can experience the fruits of my labor. I remember coming across a sentence in Philip Hii’s writings essentially claiming that break-throughs rarely occur in the first few hours of practice. I agree wholeheartedly! And, as many of you could probably attest after practicing between the hours of 11 PM to 4 AM when the world is silent, break-throughs are not so often sought as just magically appear. So in this spirit, set aside a chunk of hours, grab some tea or coffee, and explore the next sequence of preparatory movements for scales.
Focus on the following key points:
1) Practice perfect alternation – As the finger performing the stroke moves towards its resting point, the next finger should release from its resting point to prepare the next stroke.
2) Keep everything relaxed – The only energy used is in the stroke, once this is performed the finger should release all energy and tension. In the best case scenario, the tension of the finger is released as the alternating finger exerts energy on the next stroke.
3) If you are still developing a technical base, spend more time on the basics – im, ma, ia and finger alternation with p are the more important fingerings to develop as all the others contain these basic movements.
Spend as much time within each step or rhythm to achieve improved tone consistency, stroke efficiency, rhythmic precision, and perhaps, speed. Use the 3rd string as a starting point before exploring other strings. If your nails wear easily, protect them with packing tape or keep most of your practice relegated to the first three strings. And, don’t forget to use your friend the metronome!
Rest Stroke or Apoyando
Step 1
Develop rest-stroke fingerings: im, mi, ma, am, ia, ai, p, ami, ima, imam, amim, aimi.

Step 2
Develop string-crossing: im, mi, ma, am, ia, ai.
a)
b)
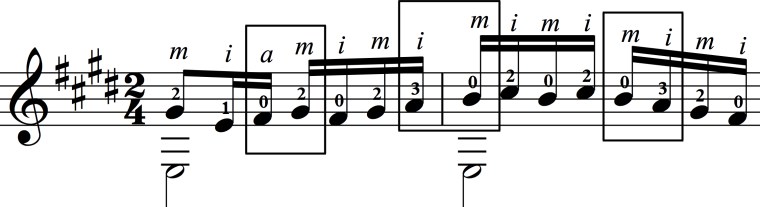
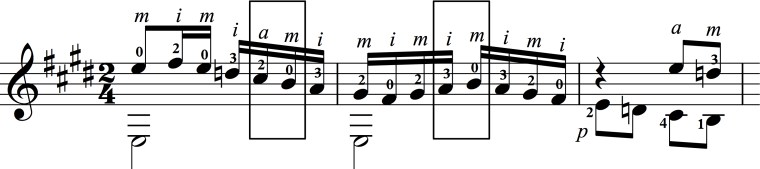
Step 3
Apply fingerings to simple coordination movements.

Free Stroke or Tirando
Step 1
Develop free-stroke fingerings: im, mi, ma, am, ia, ai, pi, pm, pa, ami, ima, imam, amim, aimi, pmi, pami.

Step 2
Develop string crossing: im, mi, ma, am, ia, ai, pi, pm, pa.
a)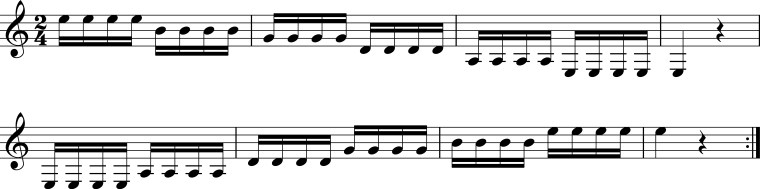
b)
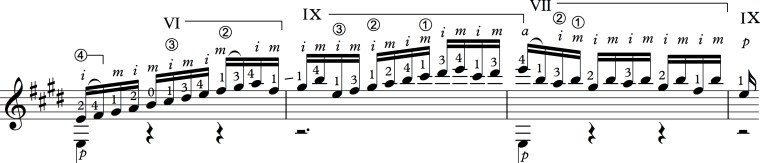
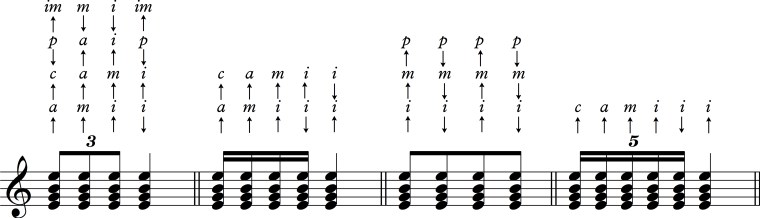
Step 3
Apply fingerings to simple coordination movements.

Bring It All Together
With a good chunk of time spent on the sequences above, you may be excited to test out the well-oiled machinery of your hands on scale forms and your repertoire. If you are looking for scale forms, stay tuned, as I plan to explore this in the next few posts.


 Rule 2