How to Visualize Your Pieces

Very early on my guitar adventure, my teacher at the time said that he would never perform anything unless he could see it physically happen in his head. He had me read a few articles on visualizing and, because I tried to be a good student and wanted to be a good guitarist, tried his advice. It was hard work. I SO much preferred to “do”. Close my eyes and sweat mentally to “see” my fingers on the fretboard? No thank you.

But, I persisted. And, from reading enough about it, am convinced it has helped me in many ways. For one, I feel more secure if I can imagine everything. Two, it inevitably builds your ability to focus. Three, I’m not sure to what degree it helps but I like to think of it as a memory safety net, one of many safety nets (mental and physical) that come with mastering pieces and eventually performing them.

At this point in my playing, I enjoy doing it. When I close my eyes, it is nice to play and hear a piece unfold in my head. Visualizing frees my musical imagination in ways that are not confined by the physical struggles of the early stages of learning new music and cold fingers.

Here is a list of visualizing techniques that I have found helpful at some point or another, some are easier than others and can be used as training wheels until you get the hang of it. Or, you’ll find the ones that work well for you and that you enjoy doing. Like exercise, the best visualizing is the visualizing you’ll actually do. From easier to more difficult:

  1. Read through the score of your piece without the guitar in hand. Try to hear it all in your head and imagine your hands playing it as your eyes scan the music.
  2. Watch a video of your favorite player and play along in your head. This is light visualization.
  3. Listen to your favorite player or a good recording of yourself and play along in your head trying to stay with it. No backtracking. If there are spots or large chunks that are blurry, work on those carefully next time you physically practice.
  4. Close your eyes, imagine a stage and where you would sit. Perform the piece in as much detail as possible with extra attention to your left hand choreography as the piece unfolds. Try the same but with the right hand.
  5. Try doing the previous step with a metronome set to an ultra slow tempo and see the piece unfold, matrix-like. Try with an ultra fast tempo. How much can you keep up? What goes blurry?

Don’t forget to smile, breathe calmly, and to remain optimistic. Happy visualizing.

One-Time
Monthly
Yearly

Make a one-time donation

Make a monthly donation

Make a yearly donation

Choose an amount

$5.00
$15.00
$100.00
$5.00
$15.00
$100.00
$5.00
$15.00
$100.00

Or enter a custom amount

$

Your contribution is appreciated.

Your contribution is appreciated.

Your contribution is appreciated.

DonateDonate monthlyDonate yearly

How to Play Cross-Stringed Ornaments

A renewed Scarlatti obsession, hearing French harpsichordist Jean Rondeau, and a recent David Russell workshop posted by the Bolton Guitar Series have me thinking about ornamentation on the guitar more than usual.

It’s been about 25 years since I took several masterclasses with David Russell in a tiny Andean village in Venezuela. Besides being a tremendously talented guitarist, David is a wonderful teacher: clear, patient, and able to make you sound better almost instantly. I learned a lot from him there and fortunately have continued to learn from him over the years thanks to videos of him working with students throughout the world. In the video (linked below), David explains his approach to ornamentation very clearly and demonstrates every example with his guitar. If you have lots of time, watch it and extract as much as you can! Here I’ll summarize the points I took away after watching it this morning.

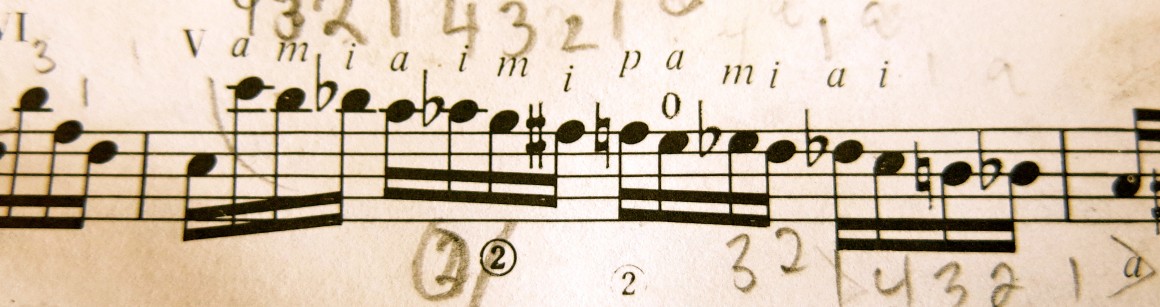
Here is a summary of the basic cross-stringed ornaments and the common (and maybe not so common) ways to execute them (the repeated right hand finger is a sweep):

And here are some of the points David mentions in the workshop:

  1. Most baroque trills begin on the upper neighbor.
  2. A brighter sound is better for ornaments. This can be achieved by attacking the string with less of a right-hand angle or by angling the right hand to a more perpendicular angle to the strings.
  3. Cadential trills are important but ornaments within the piece are more personal as to their inclusion, length, etc…
  4. Practice the entrances and exits of ornaments with turns.
  5. Mute the dissonance after the trill. This is usually done with a right-hand finger.
  6. Dynamics are important within the ornament and the musical line.
  7. A shorter trill is better than a longer out of rhythm trill unless it is cadential (where time is suspended to a greater degree)
  8. Cross-string ornaments allow baroque interpretations to vary stylistically from other periods of music.
  9. Have a higher wrist for trills.

Here are a few additional points that I cannot remember whether they are in the workshop but that I think about:

  1. The ornamented note should be in time. In order to achieve this a slight acceleration into the ornament or starting the ornament before the beat helps to achieve the correct feel.
  2. Play ornaments slower in slower melodic lines.

Check out the post I did a while ago: Cross-Stringed Ornaments, Part 1

Bolton Guitar Series: Ornament Workshop with David Russell

One-Time
Monthly
Yearly

Make a one-time donation FOR CONTENT DEVELOPMENT

Make a monthly donation TO SUpport content creation

Make a yearly donation

Choose an amount

$5.00
$15.00
$100.00
$5.00
$10.00
$20.00
$60.00
$120.00
$500.00

Or enter a custom amount

$

Your contribution is appreciated.

Your contribution is appreciated.

Your contribution is appreciated.

DonateDonate monthlyDonate yearly