Studio content
This article continues inside the Six String Journal Studio, where members have access to in-depth repertoire walkthroughs, practice guidance, and performance-focused writing.
Tag: guitar study
The Best Guided Warm-Up for Your Left Hand, Part 2
I’m in the process of creating a new series of guided warm-ups for my students. Here is Part 2 for Six String Journal readers. In these guided warm-ups, I’ll go through some of the most important drills to help you establish a good routine for warming up before practicing your repertoire.
So go grab your guitar and get comfortable. In this second video, I’ve set the metronome for quarter = 60. We’ll go through the first part of my go-to slur routine. For the right hand, I simply use p for strings 6, 5, and 4, and then use i, m, and a for strings 3, 2, and 1. Follow along, stay aware of good form, stay relaxed, and stick with it until you can start to increase tempo with a good foundation.
If you’re a beginner, take it slowly and don’t wear your hand out. Pause occasionally for rest and let your hand catch up. It might help to just watch the first few minutes to get a sense of how it unfolds for the fingers.
The Keys to Right Hand Control
In the videos below, I go through a progression of movements in the right hand that lead to better control of both rest stroke and free stroke. Grab your guitar and follow along. I hope this helps!
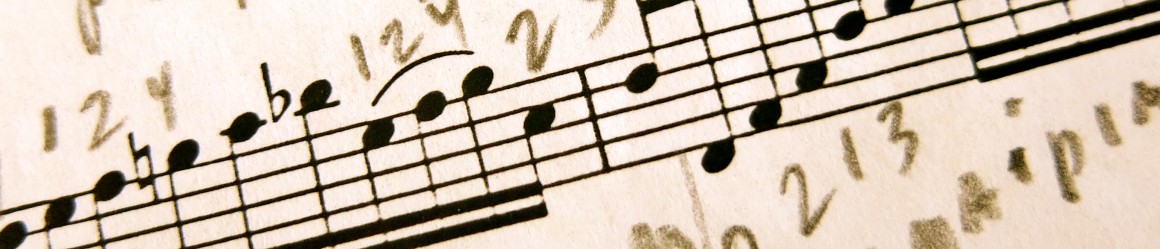
33 Ways to Improve Ears, Fingers, and Fingerboard Familiarity
Moveable Scale Forms for Development
by Leo Garcia
After watching Eliot Fisk demonstrate all of these, I thought I would write them out and share them with students. I confess that although I practiced scales religiously (and still do), I seldom went through modes. There are many reasons to work on these, though: ear training, technique development, and fingerboard familiarity.
The first form has the root starting on string 3, the second form has the root starting on string 4; and the third form works for both strings 5 and 6 . . .
Studio content
This article continues inside the Six String Journal Studio, where members have access to in-depth repertoire walkthroughs, practice guidance, and performance-focused writing.
Right Hand String Crossing Technique Tip
One aspect of Ángel Romero‘s edition of Joaquín Rodrigo’s Concierto de Aranjuez is that every single scale is fingered optimally for string crossing so that m almost always reaches towards a higher string when blazing through the scale passages (i.e. when going from string 2 to 1, it is fingered i m and not m i). And while you could employ slurs or shifts to maintain optimum string-crossing, if those solutions are not musically in the cards there is a finger standing on the sidelines waiting eagerly to help: a. Using a to switch from im alternation to mi alternation without skipping a beat is an important skill to develop for situations where you would want to maintain optimum string-crossing for the right hand. Here are a few exercises using a to develop this technique.
Keep the following points in mind when going through these.
- Maintain a steady metric pulse.
- Keep your tone consistent.
- Practice rest-stroke and free-stroke.
Exercise 1

Exercise 2 and 3

Exercise 4 and 5

Go a!
Left Hand Speed Development, Part 1
I’m working on A Technical Workout for Classical Guitar, Speed and Flexibility, and I thought I would share a portion relating to extensor development in the left hand. I will try to post a video to support this but here is something to keep everyone busy.
Excerpt from up and coming book:
Speed in the left hand is determined by several factors but two of the most important ones are the time it takes the finger to achieve precise placement on the fret and the time it takes the finger to release and reload for the next placement. The former movement depends on the flexor muscles of the fingers which are constantly worked in an active fashion (we typically focus our attention on placement) and the latter movement depends on the extensor muscles of the finger (we typically do not focus on this aspect of the movement). In a way, descending slurs work the extensors but we can be a bit more specific and pro-active about developing extensors in our left hand.
In order to develop the extensor muscles, simply place the finger and then actively release the finger back as quickly as possible achieving a slightly sloppy staccato effect with the left hand. This work does not involve the right hand at all. This movement is more strenuous than it sounds. When done correctly it almost sounds like light slurring. Keep the left hand finger placement accurate and keep the left hand contained so that it’s not the hand that is moving away from the fretboard but the fingers.
Complete Exercise 1 below with all the following left hand finger combinations:
Single Pair Finger Movements: 12, 21, 23, 32, 34, 43, 13, 31, 24, 42, 14, 41
Exercise 1 – Focus on the instantaneous release and post relaxation after the placement of each finger (example below using 12 and 21)

Good luck!
Legato and Dissonance
Creating a beautiful melody on the guitar is challenging due to the fact that every note you pluck decays from that moment on. If you play two consecutive melodic notes on one string, the touch requires extreme precision to give the impression of legato. At certain times, it is easier to achieve a sense of legato by using cross string fingerings. But there is a fine timing line between achieving beautiful legato and dissonance with cross strings and it requires the use of controlled damping – sometimes with the left hand and sometimes with the right.
Here is a great example from Leo Brouwer’s beautiful piece Un dia de noviembre. For a benign light passage there is a lot to think about musically.

Notice that in the example above muting occurs the moment after the new melodic note turns on. This is a great way to exploit the resonance of the guitar. Of course, there are many variations on this, including one where you would turn off the notes simultaneously with the entrance of the new note but this would achieve a less legato line.
Coming soon, I’m going to post a workout based on Leo Brouwer’s Axioms!
Leo Brouwer’s Axioms
Years ago, I came across an article on a Spanish site guitarra.artepulsado.com posted by Oscar López who had taken notes during a summer course with the great Cuban composer and guitarist, Leo Brouwer. The title of the post was Axiomas básicos de Leo Brouwer. I found the word file and thought I’d translate it for all non-Spanish speakers. It provides a wealth of advice. I’ve added a few commentaries below to expand the ideas a bit. Hope they are helpful.
Warm Up
Use chromatic octaves for the left hand and arpeggios and rasgueados for the right hand. Play close to the body in higher resonant positions upon starting your practice.
*I think this may mean to start your practice without having the left hand in an extended position. Starting in higher positions is less stressful for the left hand.
Speed and Scales
Use fixed, non-shifting positions in the left hand that are close to the body (i.e. higher positions) to play short bursts of notes. Play bursts in short crescendos (soft to loud or light to intense). Start on one string, then expand to two strings. Add one note at a time and pause between each mini-scale.
Add color and articulations to scales.
Left Hand Shifting
Left-hand notes should be played staccato (*perhaps he means before a shift). Focus on the arrival (not the departure) as you shift from 1st to 2nd, 1st to 3rd, 1st to 4th, etc., position.
Left Hand Independence
With a fixed first finger bar, play slurs and scales across all the strings with the rest of the fingers. Try all combinations possible.
Memory
To avoid embedding errors, do not start memorizing at the very beginning of learning a piece.
Fingerings
There are never definitive fingerings.
*What Brouwer most likely means to covey here is that fingerings evolve throughout the lifetime of learning a piece. Inevitably, we discover better, more efficient, more musical, more interesting ways to play passages and discard or change older fingerings as our familiarity with the piece increases.
Color
Exploit the three primary sonorous zones of the guitar: over the sound hole (resonant zone), over right part of the rosette (resonant and clarity zone), and near the bridge (clarity zone).
Harmonics
Do not pluck harmonics diagonally.
More Advice
- The position of the guitar to your body should remain consistent.
- Remember that the 2nd and 3rd strings tend to be the weakest so we must compensate when necessary.
- Pluck consonant chords with no arpeggiation. Pluck rare (dissonant) chords with arpeggiation for clarity.
- Velocity contains impulse and direction.
- Cadential ornaments should be in time.
- Resonance is at the heart of the guitar.
- Vibrato is used for intensity not rest.
- The thumb (left-hand) acts as a pivot during slurs.
- Forte is found at the limit of a beautiful sound.
- Breathe between phrases and project energy towards the end.
- During rasgueados the energy is channeled towards the 1st string.
- Anything that is repeated should be varied. Change either the color or the volume or the timbre.
The Best of YouTube 2
Winner of many of the top guitar competitions, French guitarist Thomas Viloteau needs no introduction to all of you following the younger generation of highly gifted classical guitarists.
Here is a video where Thomas talks about the subtleties in playing a pimami in Mauro Giuliani’s Etude 5, Nº48 (sheet music link). For those of you who do not speak french, I find that speeding up the video to read the subtitles is a quick way to get a great lesson in a fraction of the time!
In the following video, he discusses various techniques for enabling and disabling resonances on the guitar.
And in this last one, he talks about SPEED!
Hope that inspires you all. Thomas has a great dvd and cd and you can visit his website thomasviloteau.com and find out more about what he is up to. I’m going there right now to purchase his book on technique!
Maximize Your Practice
As many of you who have devoted many hours a day to learning and practicing your craft know, our ability to learn or absorb new information as in memorizing new repertoire effectively and efficiently and our ability to practice effectively and efficiently are two different things. I’ve always encouraged students to focus on quality practice – where all of our mental resources work together to analyze, explore, decipher, and ultimately embed new repertoire into our systems, instead of hours and hours of subpar or mindless work.
The dilemma in what we do, however, if we want to do it well is exactly the need for both: ultimate engagement and long hours. Though I wish I could say that I have intellectual resources that enable me to go for hours and hours with the ideal level of engagement, I don’t. I may have the desire and the passion to play but sometimes, often times, with running a business, raising two boys, running, cooking, yoga, and life, I lack the energy. So how do we maximize the time we have with the guitar and how can we put in hours when we are tired? When do we do our learning? When do we memorize most effectively? When can we get away with less mindful repetition?
One mistake I used to make was to confuse what I was doing – was I learning a new piece, working on technique, or practicing or maintaining existing repertoire? I would try to do a bit of each but despite the hours I didn’t feel like I had made headway into any one thing. Assimilating and problem solving new material is more intellectually demanding whereas practicing technique and repertoire maintenance requires slightly less creativity. Dividing your practice into specific goal-oriented sessions devoted to only one priority is more effective at achieving mastery in a more timely fashion.
So first, we must know ourselves. There are times in the day when our brains are rested, primed, and clear to absorb new information. For me, this time is in the morning (after coffee) and the first hour or two after meditating. These are prime times to problem solve, imagine an interpretation, embed new information, and decipher trouble spots in new and existing repertoire. There are other times of day when we are not as sharp – after a big meal, minute 60+ after pushing ourselves intellectually, and pre-second wind in the evening. These may vary from person to person but I think it wouldn’t be unreasonable to assume that many of us fall into this pattern. As I get older, I find that I’m not opposed to enhancing and extending these prime times (within reason) and have found caffeine or enhanced coffee from Mastermind Coffee or Kimera Koffee, being fit, a healthy diet, and certain reputable supplements like Alpha Brain and Ciltep to be very effective.
What about less mindful practice? You will get the most bang for your pluck when practicing in prime mind moments but when you slow practice with a metronome, play through familiar pieces, or try to get in the 10,000 repetitions of pimami, your brain can afford to relinquish some control to the metronome or the repetitive motions once they become automatic. The best time to do this would be anytime that is not prime. However, it is ok to use prime time for this activity though it may not be optimal for progress.
This post is becoming a ramble. So to wrap it up, practice involves many facets requiring different levels of engagement. On the more creative and mentally-taxing side, you have learning new repertoire, problem solving, visualizing, and developing interpretations. On the less intellectually demanding side you have repetition, technique work, and playing. Though resisting another tangent, I can’t help think that this may vary by individual. Is learning new repertoire easy for some while the repetition difficult? Regardless, know yourself first and then try to optimize your practice time to pair the activity with the right state of mind.