Twelve Tips on Rolling, Shifting, and More

by Leonardo Garcia

I originally thought I would do videos to show some of the concepts below in practice but in anticipation of that I thought this might help some of my students so I'll post it now. These are some recurring themes that I encounter in lessons that have solved a lot of little musical hiccups. Hope they help.

Chord Rolling

  1. When rolling chords where should the weight of the right hand fingers be distributed? I find that even though we tend to . . .

    Studio Content
    This content is restricted to Six String Journal Studio Members only. Join for access.

    Join the Studio

Identifying Problems in Your Tremolo with Thomas Viloteau

This is a guest post from tonebase.


In Thomas Viloteau’s lesson on tremolo, he describes his method for working on and identifying irregularities in your tremolo. Your tremolo must serve the music you are playing and go beyond a technique. Otherwise, what should sound like beautiful music will instead sound like an exercise.

“The music is the most important thing. If you practice your tremolo as a technical thing, when you go to an actual piece it’s either not going to work or it’s going to make your music completely flat and lifeless.” – Thomas Viloteau

What is a good tremolo?

A good tremolo allows for three things:

  1. A wide range of dynamics (pianissimo to fortissimo)
  2. Different articulations
  3. A range of different tempos (accelerando, ritardando, rubato…)

How to spot problems in your tremolo?

Get a smartphone or device that can film video at a high frame rate and play it back in slow motion. It’s the only way to SEE what your fingers are doing at such a high speed and HEAR if you are actually picking as regularly as the beat of the metronome. This will help you learn what you are doing wrong.

Once you know what to fix, practice on open strings with a metronome. Make sure the technique you are practicing at a slow speed is not just “good enough” to pass at a slow tempo – it needs to work at full speed. Try experimenting with expressive variations to test your control over the technique. As soon as your technique is ready, start practicing your tremolo within the piece and NOT in isolation, as just a tremolo exercise. It will only be great if it is MUSICAL and works within the piece!

What are the different types of tremolo?

These three approaches offer different qualities and fit different musical contexts. Experiment to find more. For all the exercises below, use a p-a-m-i plucking pattern, though in some situations a two-finger tremolo may be preferable.

  1. Basic – Resting (a) ring finger on the string before plucking it to create stability for the hand and tell your fingers where the string is. Free stroke all the way through the string.
  2. Legato – Never resting (a) ring finger on the string. Works well for piano sections and when the accompaniment is on the top. It also works well for portamento because it doesn’t silence the string.
  3. Detached – Planting each finger firmly on the string before it plays. Mostly for use on the second or third strings. The finger comes more from ABOVE the string, in this technique, and may jump a little rather than remaining totally steady.

Bonus Tips

  1. Tremolo is much easier on the first string than the second because there is more range of motion for your fingers. Take advantage of this when you make your fingering
  2. Your forearm must be super relaxed and your hand very stable.
  3. To minimize the sound of your nail hitting the string, you must make sure that your flesh is hitting the string before the nail.
  4. It is easy for the middle finger to fall out of time. If this is happening, accent the middle finger’s plucking.

Watch Thomas Viloteau’s lessons and more on tonebase Guitar.

Two of the Best Tremolo Exercises

Studio Content
This content is restricted to Six String Journal Studio Members only. Join for access.

Join the Studio

How to Play Cross-Stringed Ornaments

A renewed Scarlatti obsession, hearing French harpsichordist Jean Rondeau, and a recent David Russell workshop posted by the Bolton Guitar Series have me thinking about ornamentation on the guitar more than usual.

It’s been about 25 years since I took several masterclasses with David Russell in a tiny Andean village in Venezuela. Besides being a tremendously talented guitarist, David is a wonderful teacher: clear, patient, and able to make you sound better almost instantly. I learned a lot from him there and fortunately have continued to learn from him over the years thanks to videos of him working with students throughout the world. In the video (linked below), David explains his approach to ornamentation very clearly and demonstrates every example with his guitar. If you have lots of time, watch it and extract as much as you can! Here I’ll summarize the points I took away after watching it this morning.

Here is a summary of the basic cross-stringed ornaments and the common (and maybe not so common) ways to execute them (the repeated right hand finger is a sweep):

And here are some of the points David mentions in the workshop:

  1. Most baroque trills begin on the upper neighbor.
  2. A brighter sound is better for ornaments. This can be achieved by attacking the string with less of a right-hand angle or by angling the right hand to a more perpendicular angle to the strings.
  3. Cadential trills are important but ornaments within the piece are more personal as to their inclusion, length, etc…
  4. Practice the entrances and exits of ornaments with turns.
  5. Mute the dissonance after the trill. This is usually done with a right-hand finger.
  6. Dynamics are important within the ornament and the musical line.
  7. A shorter trill is better than a longer out of rhythm trill unless it is cadential (where time is suspended to a greater degree)
  8. Cross-string ornaments allow baroque interpretations to vary stylistically from other periods of music.
  9. Have a higher wrist for trills.

Here are a few additional points that I cannot remember whether they are in the workshop but that I think about:

  1. The ornamented note should be in time. In order to achieve this a slight acceleration into the ornament or starting the ornament before the beat helps to achieve the correct feel.
  2. Play ornaments slower in slower melodic lines.

Check out the post I did a while ago: Cross-Stringed Ornaments, Part 1

Bolton Guitar Series: Ornament Workshop with David Russell

One-Time
Monthly
Yearly

Make a one-time donation FOR CONTENT DEVELOPMENT

Make a monthly donation TO SUpport content creation

Make a yearly donation

Choose an amount

¤5.00
¤15.00
¤100.00
¤5.00
¤10.00
¤20.00
¤60.00
¤120.00
¤500.00

Or enter a custom amount

¤

Your contribution is appreciated.

Your contribution is appreciated.

Your contribution is appreciated.

DonateDonate monthlyDonate yearly

NEWS! Complete Technique Video Course Launch!

Studio Content
This content is restricted to Six String Journal Studio Members only. Join for access.

Join the Studio

Active Practice Techniques to Improve Tremolo, Part 4

Studio Content
This content is restricted to Six String Journal Studio Members only. Join for access.

Join the Studio

Active Practice Techniques to Improve Tremolo, Part 2

Studio Content
This content is restricted to Six String Journal Studio Members only. Join for access.

Join the Studio

Active Practice Techniques to Improve Tremolo, Part 1

Studio Content
This content is restricted to Six String Journal Studio Members only. Join for access.

Join the Studio

Tango en Skai – 5 STEPS TO MORE SECURE PLAYING

During a lesson last night, a musically talented young student played Roland Dyens’ Tango en Skai. He had played it a few years ago when he was 9 (!) and had been reworking it for fun. Like most young players excited about guitar, the desire to play is overwhelming to the point that it crowds out actual practice and more importantly, the crucial aspect of practice: reflection. A piece will get to a “pretty good” level and, while it may be pretty well played, it is not mastered or excellent. So, we addressed this by using the first run in Dyens’ Tango as an example of how to actually practice for marked improvement.

Tango 1.jpg


STEP 1 – PLAY RIGHT HAND ALONE SLOWLY

Tango RH.jpg
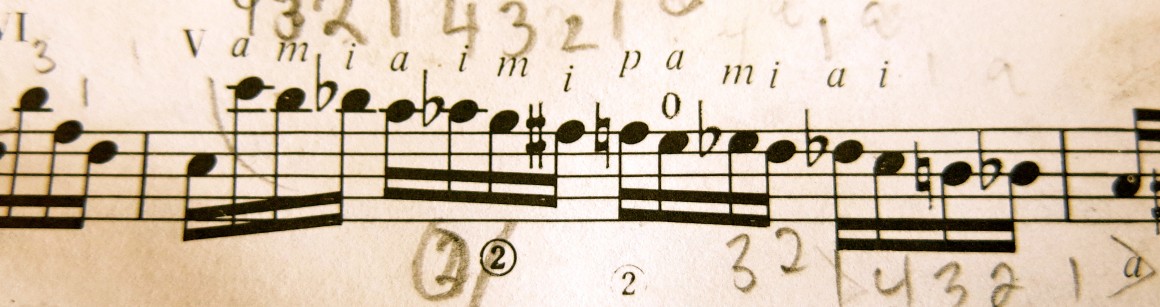
This step is easy to spend the most time on because it will make you question right hand choices if you have not thought about them in this context. Actually seeing the open strings is different than seeing the original score and imagining the right hand. New patterns are optically sought out and if you are a visual learner, seeing a map is easier than imagining it. We chose to stick with the student’s right hand choice but it was interesting to watch such a talented player struggle to play it very slowly (sixteenth = 60 bpm). We lingered luxuriously in this stage playing at different tempi until we were convinced the right hand’s sense of rhythm and pulse had tightened up.


STEP 2 – PLAY RIGHT HAND ALONE WITH DYNAMICS

Tango dynamics.jpg


STEP 3 – SEARCH FOR STABILITY POINTS

We answered some key questions. Where is thumb? Working out when and where thumb plants on the strings between strokes or in anticipation of strokes greatly increases right hand stability for the rest of the fingers. Where can I plant other fingers? Because the right hand movement is continuously ascending towards string 1, planting helps control dynamics and insures that the fingers are in place before their turn is up. Then, of course, we spent time practicing the incorporation of planting into the right hand choreography. After a few minutes, the right hand was behaving like a true champ: strong, secure, comfortable, happy!

Dyens plant.jpg


STEP 4 – ADD LEFT HAND BACK IN

This is where most students who are hyper-focused on left hand and playing are astonished by what they sound like. The playing sounds crisp, exact, musical, and free. Hopefully, at this stage, the aural and physical reward is strong enough to convince the student to start truly practicing and instill the desire to play everything at a level approaching mastery.

*We can go further here by applying rhythms, pushing the tempo to build a reserve, practicing left hand alone, but for now, this is where we left it.

STEP 5 – Take a new passage, and go to step 1!

Hope this helps!